
Appearance
Quickstart
Below is a guide to get you started with Overlay Studio as quickly as possible and try out its functionalities.
Install Overlay Studio
Install the extension from your editor's extensions marketplace:
- Open the Extensions view.
- Search for Overlay Studio.
- Install the extension published by overlay-studio.
- Reload the editor if prompted.
You can also open the extension directly in your editor:
(Note: you need to have the corresponding editor installed on your device for the links above to open.)
Open a project
TIP
If you want to try Overlay with a sample project, you can clone this repo and follow the steps indicated to get started.
Open a repository or workspace that contains the app or component library you want to design with.
Overlay internally creates a project for each repository you launch it from. This keeps the correct design file close at hand when you open your IDE, mapped to the current folder.
Launch Overlay
After installing the extension, launch Overlay in one of these ways:
- Click the Overlay Studio icon in the Activity Bar.
- Run Overlay: Open Editor from the Command Palette.
The Overlay editor opens in a new editor tab. The Overlay side panel stays available in the Activity Bar for design system actions, component imports, and editor state.
Add your design system
INFO
If you already have a design system set up (e.g. via the demo project), skip to the Create your first design section.
Overlay can use design tokens from any project's CSS, and React components from a Shadcn/ui project are detected and imported automatically. Custom (non-Shadcn) components can be registered manually or with AI assistance — see Importing components.
Follow the steps below to connect it.
Color tokens
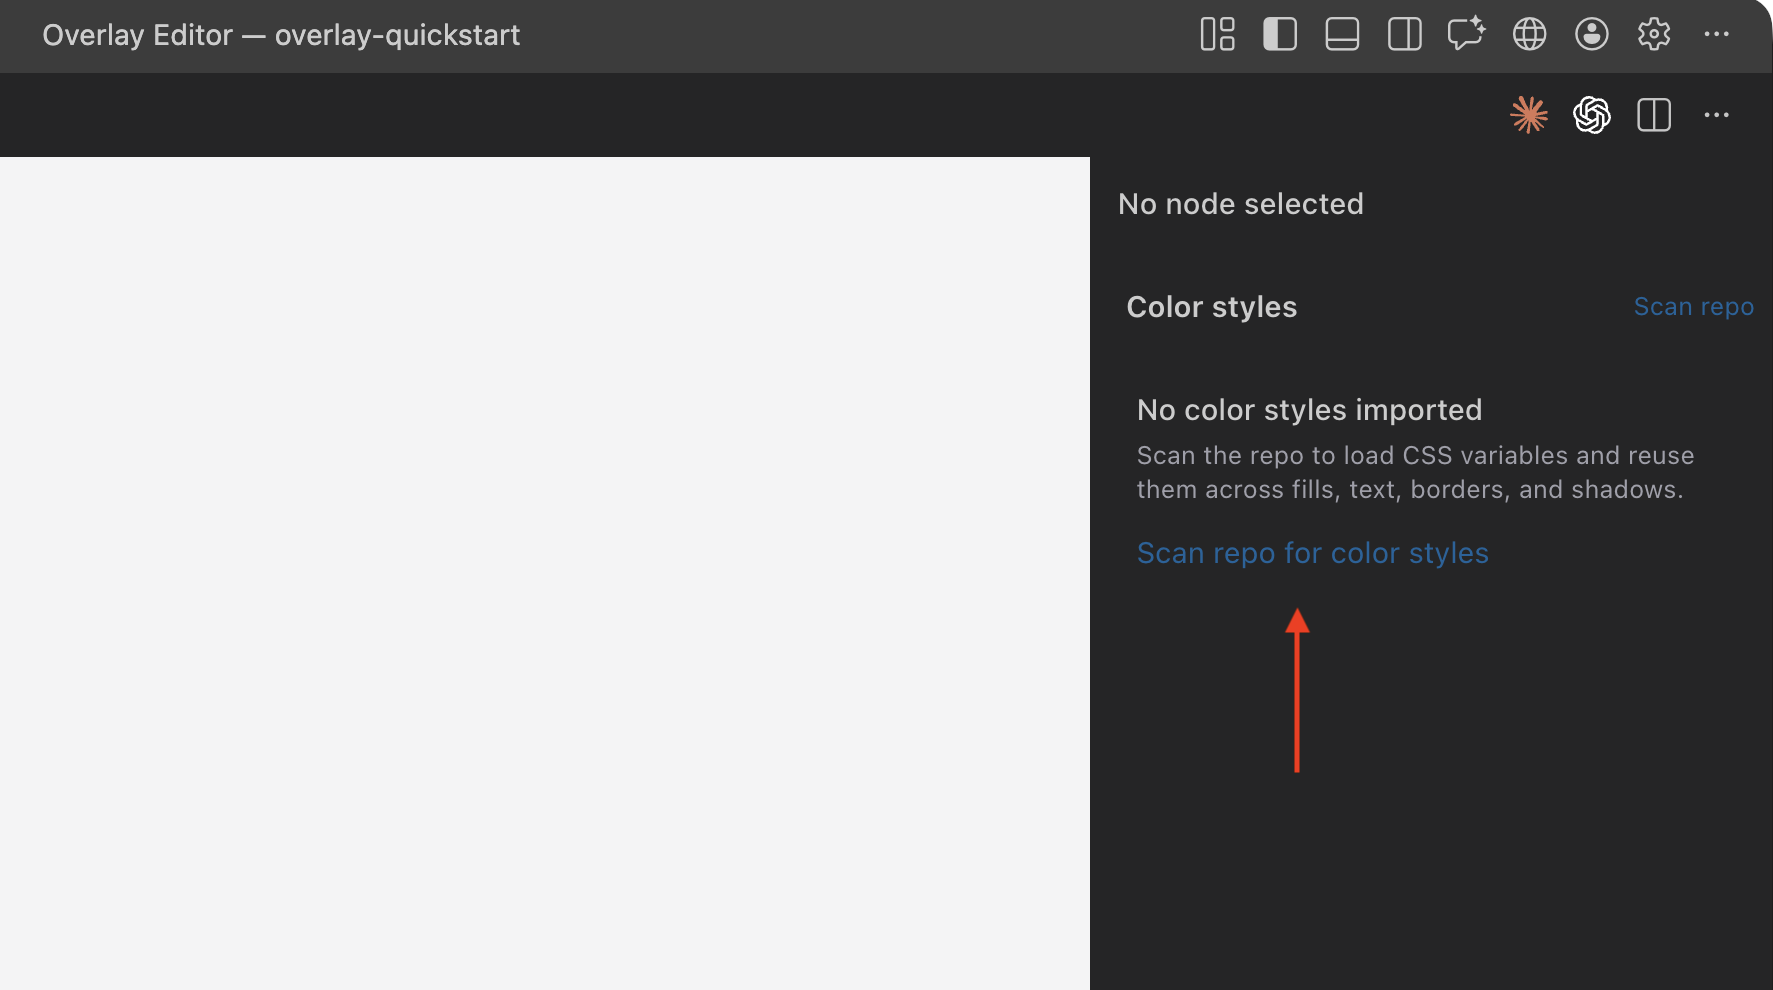
Overlay scans CSS variables in your workspace and writes the result to .overlay/config.jsonc. To scan your colors, click the "Scan repo" button in the right panel of the app.
See config.jsonc Config for the supported token format.
React components
To expose React components in Overlay, create or update .overlay/components.jsonc.
If your project uses Shadcn/ui, Overlay can detect the setup and import supported components from the side panel. For custom components, ask an AI assistant connected via MCP to register it for you.
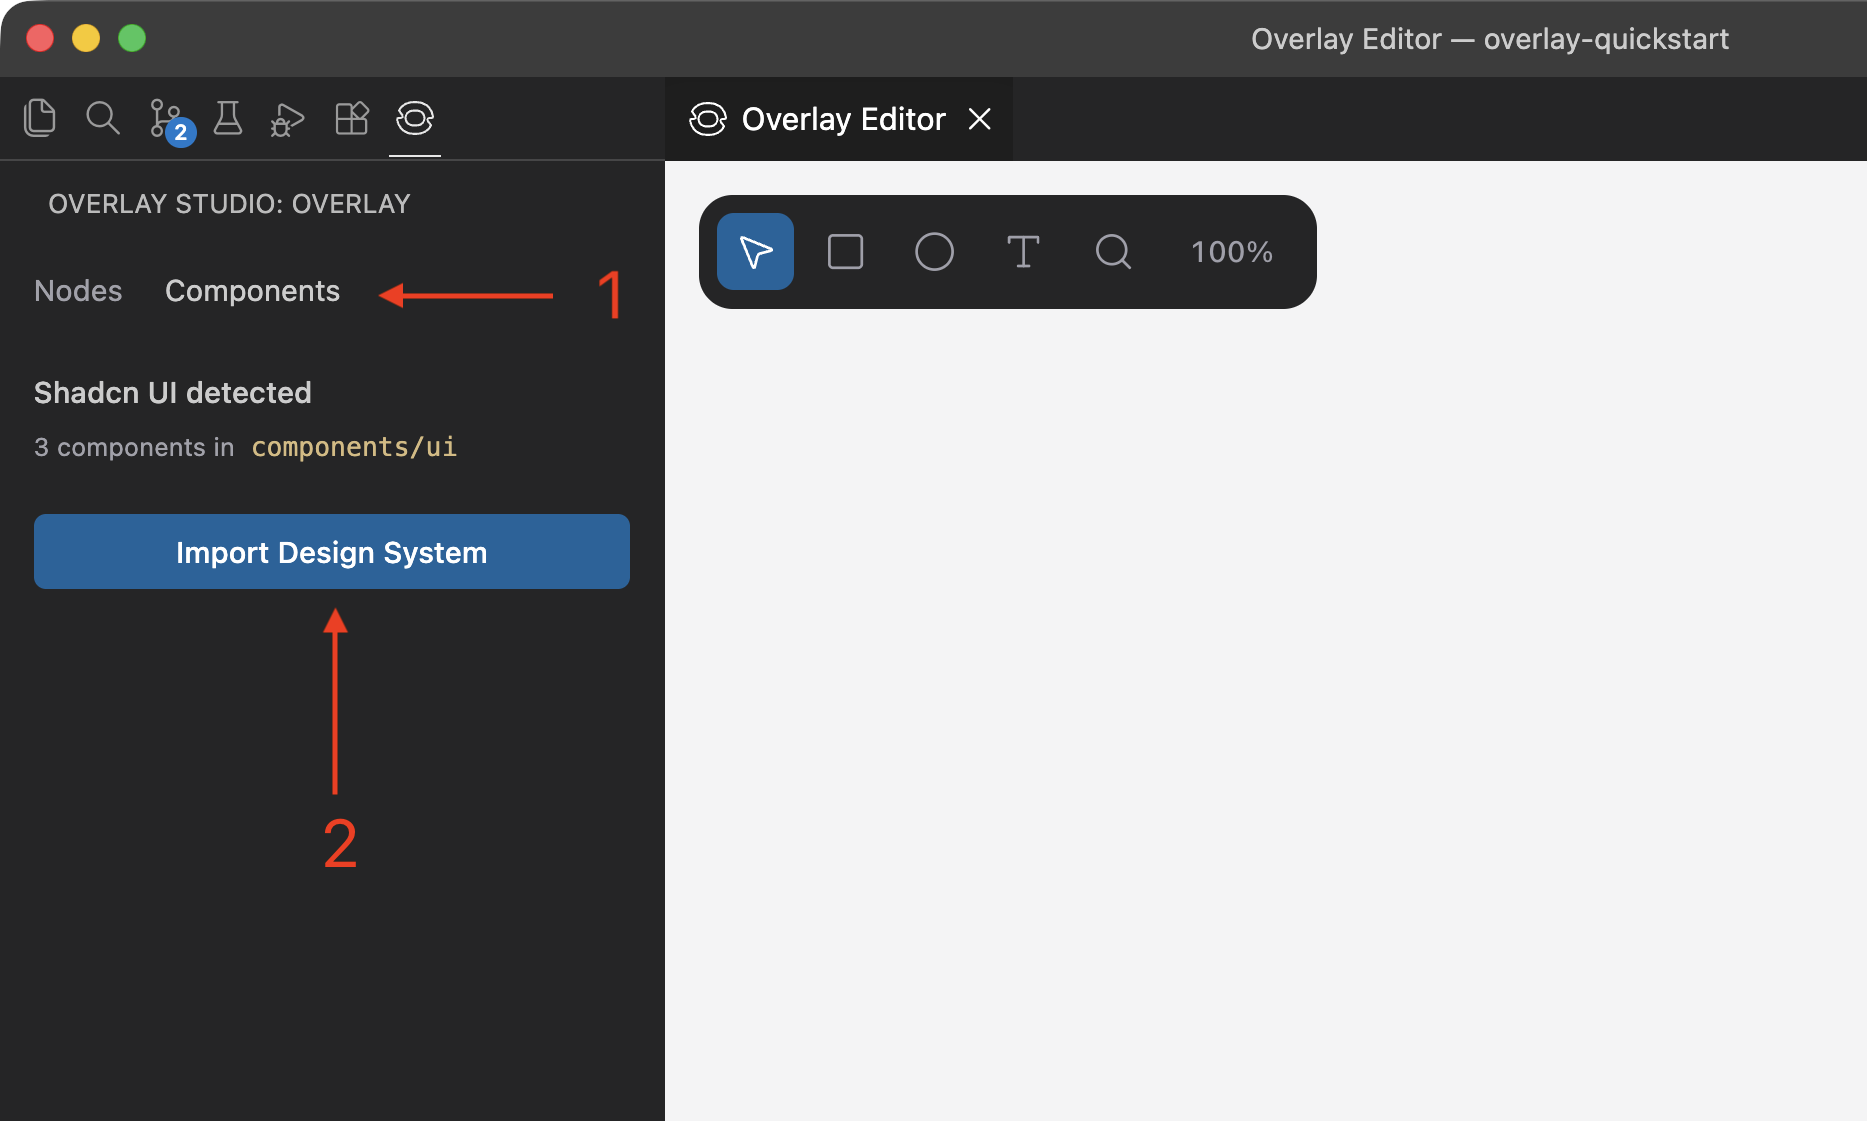
See Importing components for all three options, and components.jsonc Config for the file format.
The same file can also declare whole icon libraries — point it at a popular package like lucide-react, Tabler, Phosphor, Feather, or Radix (or your own folder of SVGs) and browse every icon from the editor's Icons tab.
TIP
Commit .overlay/config.jsonc and .overlay/components.jsonc when you want teammates to share the same Overlay design system setup. If the setup is only local, add .overlay to your .gitignore.
Create your first design
With the editor open, start designing on the canvas using Overlay's native elements and any components imported from your codebase.
If you are using an AI assistant, connect it through the Overlay MCP server — the Overlay side panel can detect and connect supported agents with one click after you open the editor. See Overlay MCP for setup instructions.
Once connected, start your request with the /overlay/design prompt (e.g. /overlay/design build a pricing table) so the agent knows to work in Overlay without you having to say so.
Troubleshooting
If Overlay does not open:
- Confirm the extension is installed and enabled.
- Open a workspace folder before launching Overlay.
- Run Developer: Reload Window from the Command Palette and try again.
- Make sure your editor version supports VS Code extension API
1.99.0or newer.
If components do not appear:
- Check that
.overlay/components.jsoncexists and uses paths relative to the workspace root. - Confirm the component file exports the component you configured.
- Reload the Overlay editor after changing component configuration.
For more help, contact [email protected].